Friday, August 17, 2012

Vintage Button Strands

When the weather turns so nasty-hot that I'm stuck indoors, panting in front of the mini AC unit, nothing makes me happier than a quickie project I can do while watching movies with my feet up on the coffee table. These are so dang fun.... two-yard-long loops of crocheted C-Lon cord studded with some of my favorite vintage buttons. They can be worn long, doubled, tripled, or knotted.

 This one is all white... mostly vintage shell buttons. I fell in LOVE with it!

Love to wear these wrapped around my wrist as bracelets.
Sometimes I do just beads.... on a colored C-Lon. A bit shorter and more elegant...

Monday, July 30, 2012

Bottle Pendant Madness!

Here's two more tiny perfume bottle pendants, both 1 & 1/4 inches tall.


The red labeled bottle once held the exotic sounding "Balalaika" fragrance. This one just insisted that I use red seed and bugle beads to fill it. Wrapped in raw copper.
Sadly, the label on the Balmain bottle was already slightly damaged.. just enough to obliterate the rest of the word "PARIS" on the bottom, but I still love it. This one is filled with crumpled gold leaf foil and wrapped with black steel.

I've been having so much fun doing the photography... scouting locations all around my yard. So pretty up close!

Friday, July 27, 2012

Perfume Bottle Pendants

What do you do when someone gives you a bucket load of tiny vintage sample perfume bottles?
And I do mean tiny...
If you're me, you start wire wrapping them into jewelry...
Which quickly becomes an obsession...
This one once contained Nina Ricci's scent, Capricci. I filled the empty bottle with gold seed beads and used black steel wire for the wrap.

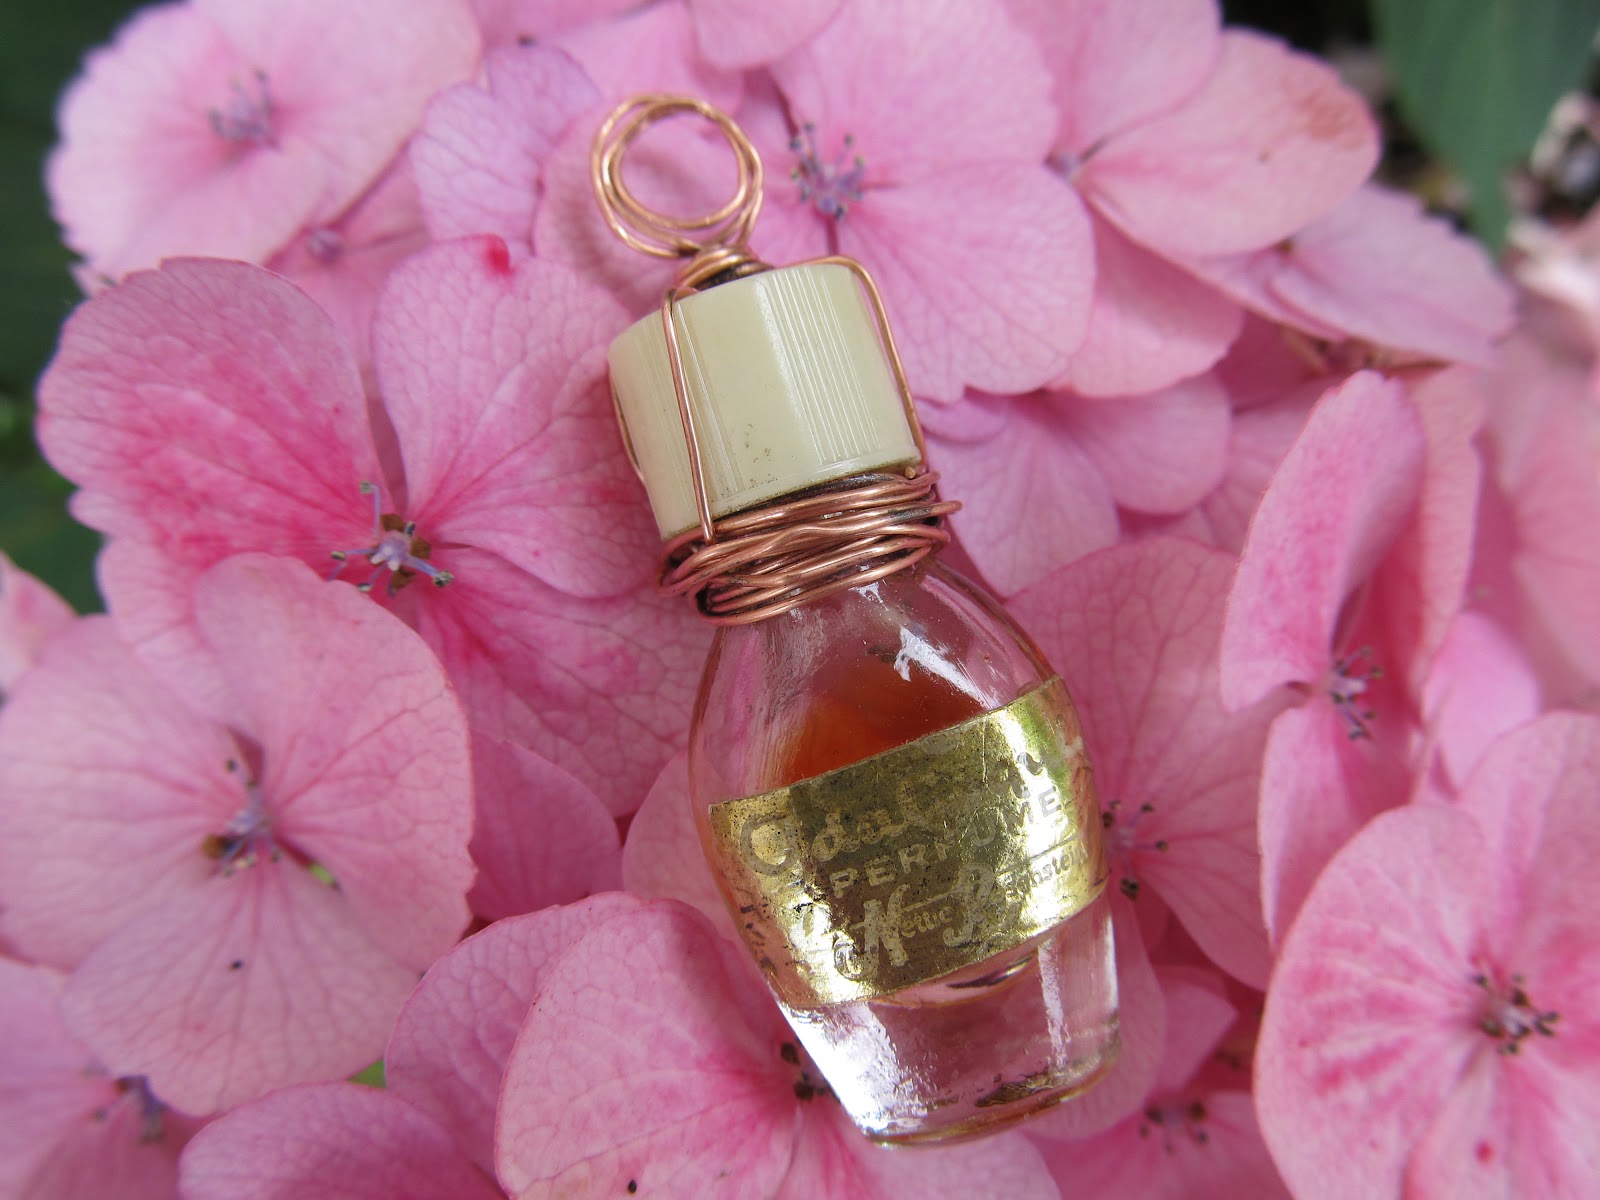
This next one is called Odalisque, by Nettie Rosenstein. It still had a few drops of caramel colored syrupy scent inside, which I decided I liked the look of, so I glued the lid on tight and just wrapped the neck of the bottle to let the color and the oval shape of the bottle show.

The one above is an oddball, with a very faded unreadable label. It's filled with the same seed beads I threaded onto the wire as I did a messy abstract wrap in copper. Just under 1.75" tall.


Next, INTOXICATION, by D'Orsay. I can't help it... this one knocks me out.
I filled this little 1.5" bottle with crinkled up gold leaf foil.
Kept the wrap simple and used black steel again.
So, what's next? Stay tuned... I just bought twenty-one more vintage bottles on etsy!

Wednesday, July 18, 2012

Inspired by Lynne Sward

Long ago and far away... well, nearly ten years ago anyway, I bought a book titled Making Creative Cloth Dolls, by Marthe Le Van.  I was instantly enthralled. This book marked a turning point for me, after which I knew I wanted to make art dolls. A number of artists in the book stood out for me, notably Pamela Hastings and Lynne Sward, and sparked something in my creative soul.

I'm posting now about the doll I was inspired to make at that point, because I now find myself involved in a wonderful collaborative project with seven other women, including both Pamela and Lynne. I'm pinching myself daily at the very idea of working with these great women! We're each starting a doll and sending it on, round-robin style, to the next woman in the circle. Our first send date is coming up August first, then some time next spring, we'll each have a completed doll that each artist contributed something to.

But getting back to the past... I spent hours paging through this book, savoring every delicious image. Then, overwhelmed with creative energy, I dove into my box of fabric, dusted off my sewing machine and decided to make a doll based on Lynne Sward's "Personal Symbol Figure".

This next image is of another doll Lynne made, not the same one in the book, but very similar:

(I borrowed the photo from the Cristallo Studio website, where this particular doll of Lynne's is listed for sale.)


Mine didn't turn out to resemble Lynne's example very much, except in it's basic primitive shape, deep blue background fabric and "pancake" construction with machine zig-zagged seams. I had to simplify the surface design because I didn't have any fusible interfacing at the time (and I wanted to make this doll RIGHT NOW!), so I skipped the appliqué process she had outlined and just used her technique of decorative free form machine top-stitching and changing out of the top thread colors.

As I started doing this stitching, I was thinking of acupuncture meridians flowing through the body, and because this doll project was a "Personal Symbol", I really took that seriously and used the stitching to indicate basic female characteristics but also let the stitching highlight some areas of my body where I was experiencing "issues" or pain at that time, such as in my right hip and shoulder. My stitched "energy meridians" are strictly imaginary here... as I had little knowledge of where the real ones actually are and didn't refer to any acupuncture resource as I was making it.

I decided I really liked the surface design the stitching created, and left it "as is". I added a few really special buttons that I'd been carrying around for years, and some beads for toes.

It was months later that I finally finished the face, which doesn't resemble Lynne's doll at all. I used embroidery and buttons, and shaped an appliquéd felt nose, then added cotton yarn hair. Once I finally completed that face, it felt so good. This doll was really for ME... and my first finished art doll!

After all these years and a bit faded with time, this doll still hangs on my studio wall as a reminder of when this newest phase of artistic endeavor in doll making really started. And now, it's an honor to be able to personally tell Lynne THANK YOU for the inspiration!

I'll be posting more about the Hot Flash Community's collaborative doll project soon.

Tuesday, June 26, 2012

Love Birds

I've been waiting to blog about the sweet little love bird cake toppers I made for my son's wedding... until after the wedding. Sean and Nicole showed me a birdie bride and groom on etsy that they wished they could afford, but wondered if I might be able to re-create for them. So, with complete and utter homage to the amazing Tuck and Bonte, who designed the originals, I did my best.

Mine are ever so slightly different, but I was absolutely copying their design here, so don't want anyone to think they came from my imagination. If you want a pair for your very own wedding cake, please visit Tuck and Bonte's etsy shop and have them create them for you... as I will likely not make another pair until one of my grandchildren is getting married!

Having only the photos to go by, I had to figure out for myself how these birds were made. I started with little decorative birds from the craft store and stripped off all their feathers, then carved the underlying styrofoam a bit with an Exacto knife to get the shape of the heads just right.

They each received a coat or two of gesso, then wings and tail made of heavy card stock. The legs they came with were removed and in their place, I inserted long pieces of copper wire.
Masking tape was wrapped around the wire, and then a finer gauge of copper wire... to about halfway down the exaggeratedly long legs, to where we wanted their little feet to be.

Additional inches of wire below the feet allowed the birds to be poked into the cake so they'd stand there nicely, with their toes in the frosting.

Using Mod Podge, I then layered the birds all over with vintage dress pattern tissue, choosing symbols, words and other markings just so...


Gather... together... join to circle... bind.  I also chose some of the French phrases that were marked on the pattern tissue... just for Nicole.

The bride got red lipstick, lovely long eyelashes, a veil and pearls.

The groom... a tiny black felt top hat and satin bow tie. (Trust me, if you ever want a challenge, just try making a felt top hat that fits on the tip of your pinky finger!)


Each birdie also has a tiny gold ring on their left foot.

Only one thing could be better than seeing the look on Nicole's face when I presented the finished birds to her at her bridal shower...

...and that was seeing the final presentation, on top of that incredibly exquisite cake!

The wedding was just amazing and beautiful, with so many unique hand-crafted details. Despite the heavy rain that morning, it was the perfect afternoon wedding for this couple in love... my son and his beautiful bride!